“Stable Diffusion” has recently released the SDXL 1.0 version (hereinafter referred to as SD), which should have better image quality and simpler prompt words. However, I haven’t been using Stable Diffusion much, just playing with it occasionally. Recently, I wanted to generate some content farm articles, so I researched language models and TTS, but now I’m missing the ability to automatically generate images. So I did some research on SD, but found that the prompts are not easy and are much more difficult than Dallee-3.”
But actually, SD is not bad either, it just requires more parameter tuning and prompt words. So let’s start by studying the more interesting Lora fine-tuning model.
This article is relatively complicated and involves setting up an SD using Docker and fine-tuning the environment. Since the goal of this project is to minimize changes, it was decided to use Docker. This article still uses the most popular Trump photos as examples. If President Trump has any objections, please feel free to contact me anytime.
Set up Docker container
Use the following command to create a Docker container.
|
1 |
docker run -it --gpus all --ipc=host --ulimit memlock=-1 --ulimit stack=67108864 -p 7860:7860 -p 7861:7861 -p 2222:22 nvcr.io/nvidia/pytorch:22.12-py3 |
Install packages
|
1 2 |
apt-get update apt install build-essential cmake libgl1-mesa-glx python3-tk openssh-server |
Edit /etc/ssh/sshd_config and change the following items to the following:
- PermitRootLogin yes
- UsePAM no
Use ‘passwd’ command to set a password and change it to a non-empty value.
Run the following command to enable ssh server when container starts up.
|
1 |
echo "/etc/init.d/ssh restart" >> /root/.bashrc |
Alternatively, you can start the ssh server immediately with the following command:
|
1 |
/etc/init.d/ssh restart |
Install Miniconda
Because we will run two projects simultaneously, download and install miniconda. The installation process is the same as anaconda, so it will not be repeated here.
Install Stable Diffusion
Use ssh to log in and create a conda environment first.
|
1 2 |
conda create -n sd python=3.10.8 conda activate sd |
Download the project next.
|
1 2 |
git clone https://github.com/AUTOMATIC1111/stable-diffusion-webui cd stable-diffusion-webui/ |
Edit the “webui.sh” file and set the following items as follows:
- use_venv=0
- can_run_as_root=1
Then execute “webui.sh”, the program will automatically install required packages.
|
1 |
./webui.sh --listen --port 7860 |
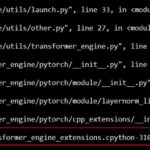
If there are any errors in the middle, you can try reinstalling torch to solve the problem.
|
1 2 |
pip uninstall torchvision torch pip install torchvision torch |
Install Kohya
Use ssh to log in as second terminal (important to avoid environment conflicts). First, create a conda environment.
|
1 2 |
conda create -n kohya python=3.10.8 conda activate kohya |
Download the project next.
|
1 2 3 4 5 |
git clone https://github.com/bmaltais/kohya_ss pip install scipy cd kohya_ss/ ./setup.sh ./gui.sh --listen 0.0.0.0 --server_port 7861 --headless |
There may also be errors when running this command, which can be resolved by reinstalling torch. If encountered again, try it again; if not encountered, it can be ignored.
|
1 2 |
pip uninstall torchvision torch pip install torchvision torch |
But when Koyha starts, it checks the version of the package and if there is an error, it will be reinstalled, so you need to modify the requirements.txt file to use your installed latest version.
Sometimes it will be mentioned that the “accelerator” is not configured. You need to run “accelerator config” and set the precision to fp16 at the last step. Other settings can follow the default values.
File preprocessing and automatic generation of prompt words
Please copy the example file from this link to your root directory via SSH and decompress it at /root.
Then use the browser to connect to the SD web page at http://IP:7860 to perform automatic file cropping and automatic keyword judgment.
After entering the page, choose “Train” –> “Preprocessing Images”, and fill in the setting values according to the following description.
- Source directory: /root/raw/30_trump/
- Destination directory: /root/out/30_trump/
- Select BLIP for caption.
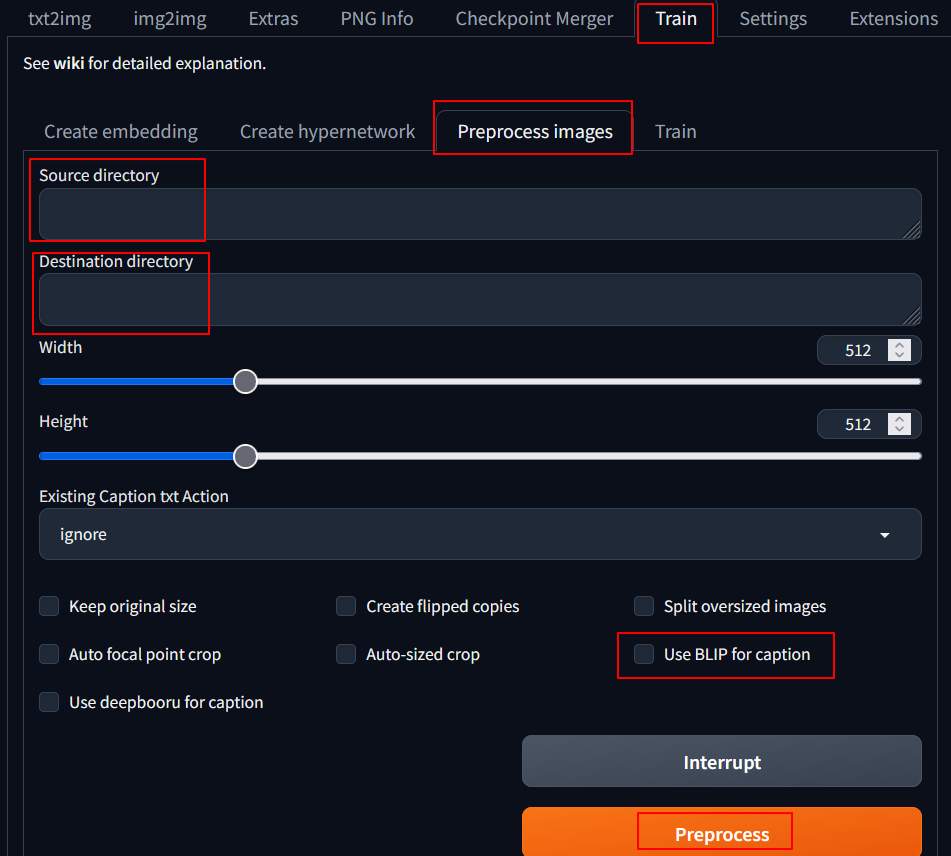
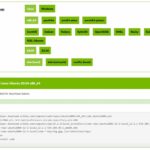
Then you can choose “Preprocess” to process, it will first start downloading other models (which should be used for image-to-text), and then process.
After processing, you can see that there will be one additional text file for each image in /root/out/30_trump. And the same named text file is the description of the picture. Then add “, trumpboss” to the line end of each text file to associate this word with the picture, so that when fine-tuning this model later, it can apply some styles of this picture. There is an addtag.sh example inside which can easily add the above tag directly.
|
1 2 3 |
cd /root/out chmod a+x addtag.sh find 30_trump/ -name "*.txt" -exec ./addtag.sh {} \; |
Regarding the modification of image prompt words, I did not do any special research. Those who are interested may need to look for themselves again. The direction of improvement based on the unprofessional impression of watching videos is as follows:
- If you want the part of the picture that can be replaced, do not describe it in the text file.
- If you don’t want a specific item to be replaced, describe it in the picture.
Kohya LoRa training
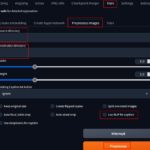
Open browser IP:/7861 to start running Kohya. Set parameters as follows:
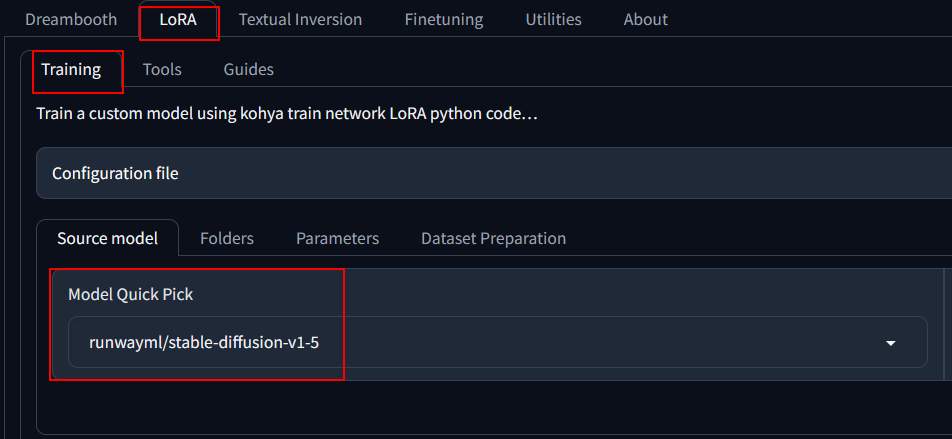
Lora –> Training
- Source model: runwaym/stable-diffusion-v1-5.

Lora –> Folders,
- Image Folder: /root/out
- output folder: /root/model
- Module output name: trump
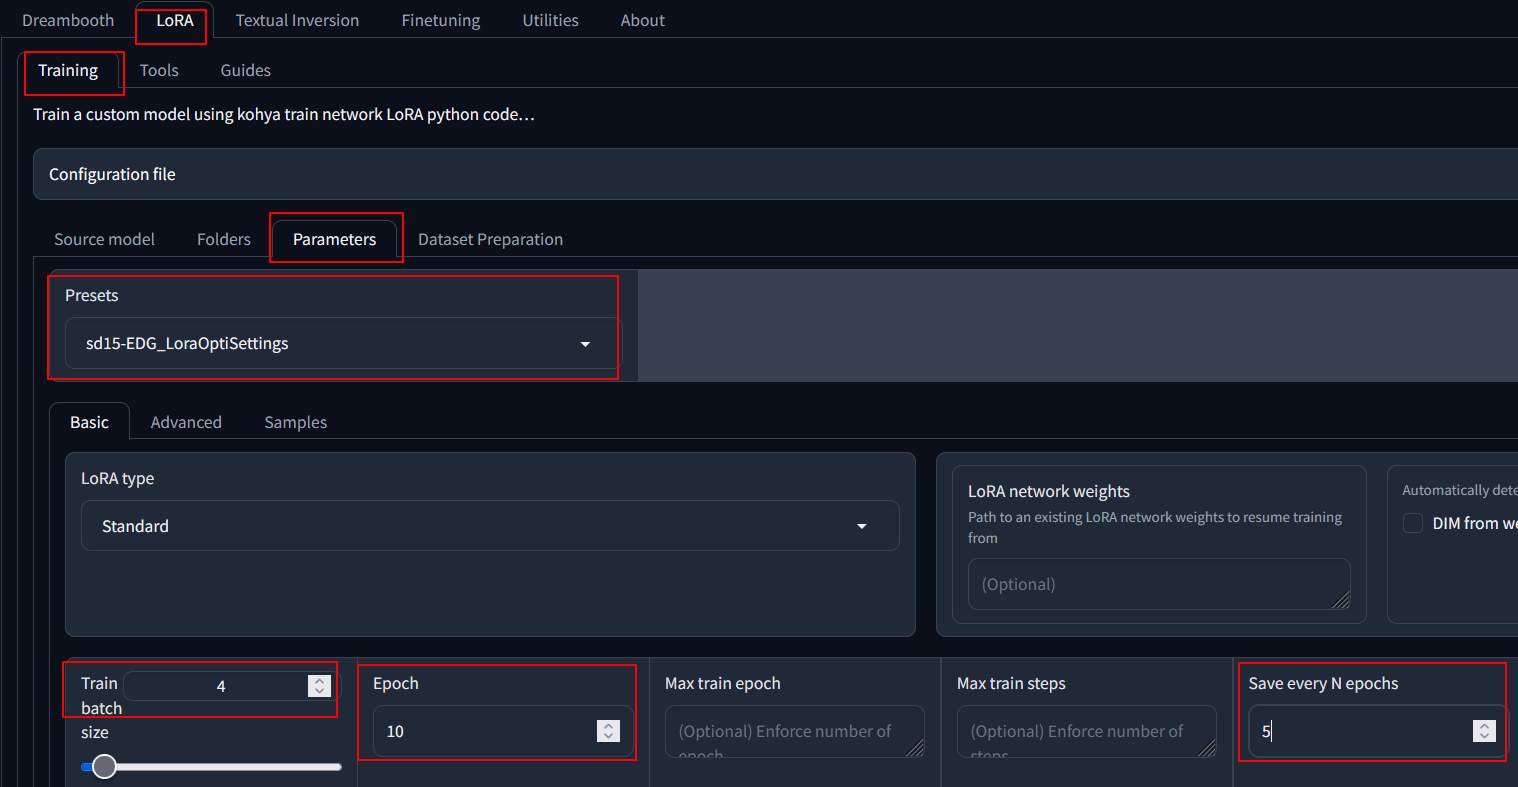
Lora –> Parameters
- Preset: sd15-EDG_LoraOptiSettings
- Train batch size: 4
- Epoch: 10
- save every n epoch: 5
Then you can go to the bottom and press “start training”. Several models will also be downloaded first. If trained with 4090, it takes about 5 minutes to complete.
Note that the model you used in SD is to be the same as the one used by Lora for training, all models used in this article is v1.5.
Copy the file to the “Lora” directory after training is complete.
|
1 |
cp /root/model/trump.safetensors /root/stable-diffusion-webui/models/Lora/ |
Naming principles for directory
In the processed image directory, I use “30_trump” as folder name. It is said that 30 refers to the number of times an image needs to be trained. If you feel that the time is too long or not good enough, you can try adjusting it.
Apply SD model to Lora
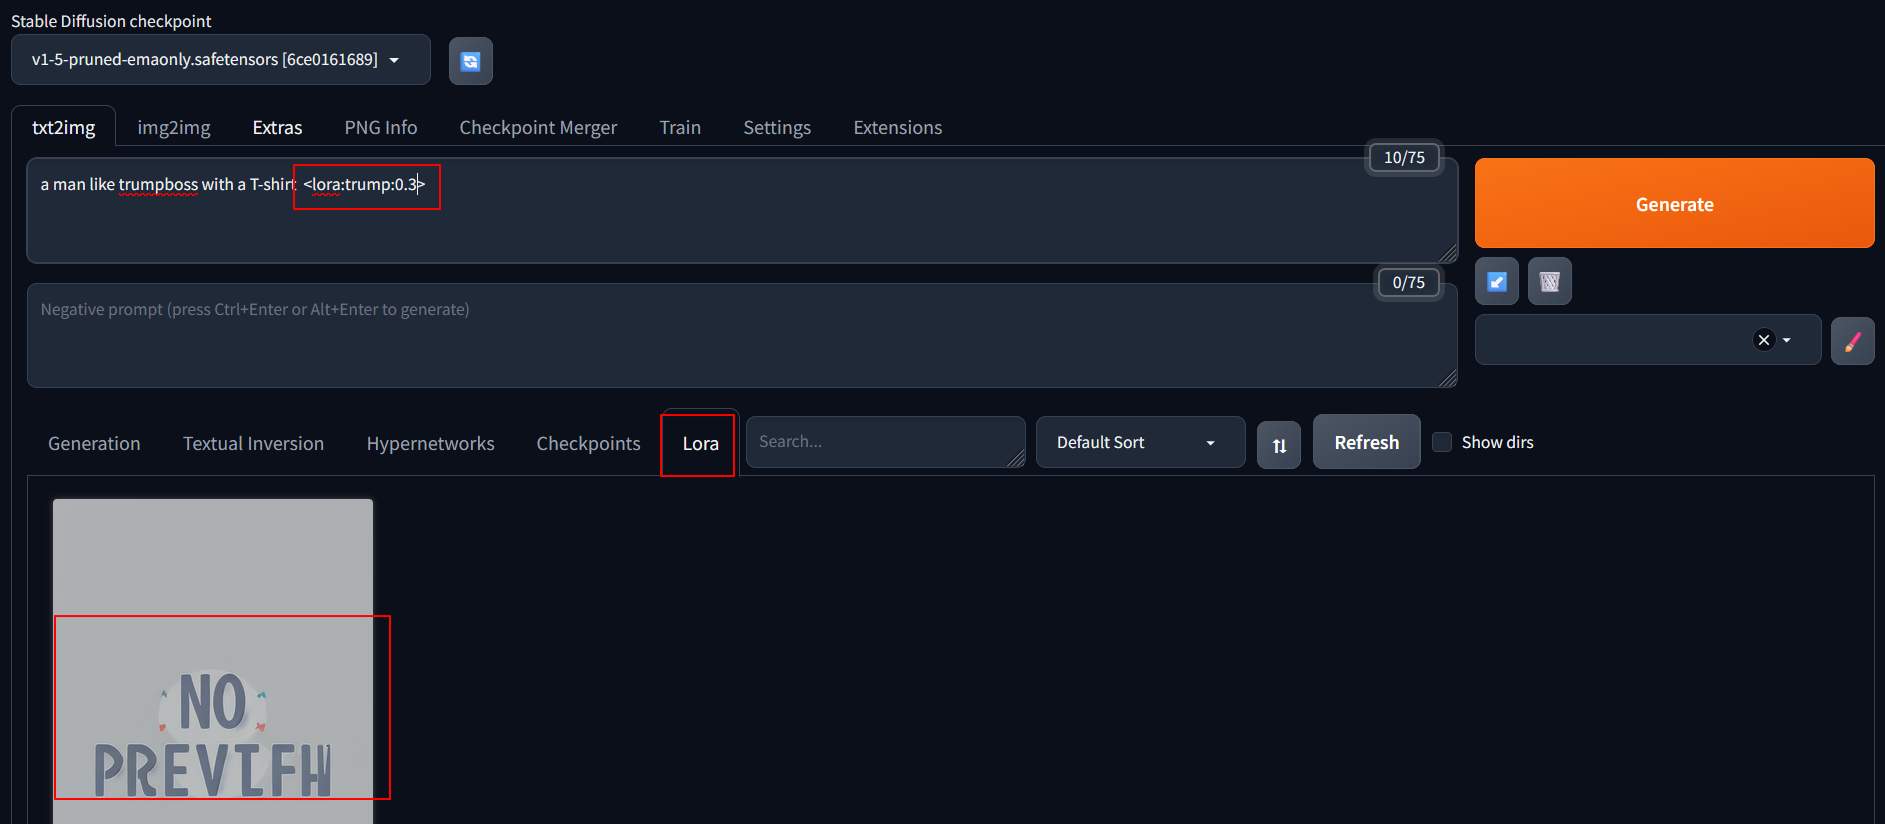
Restart the SD, connect to it and enter “a man like trumpboss with a T-shirt <lora:trump:0.5>” at the prompt. Press the trained model on the Lora tab, and the parameters will be automatically entered. Adjust the weights and try out different effects.

Conclusion
The process is not too difficult, but it seems a bit complicated due to too many steps. In addition, the installation of packages often results in errors. It is recommended that those who want to use it for a long time install it within Docker, which will save trouble. Kohya is the part that is more prone to error, and it feels like the installation situation is different every time @@, hoping that there will be more convenient packages in the future.
